
Hey DIY beauty lover! So you want gorgeous nails but you don’t have the time, money, or desire to hit the salon every week? I totally get it. Professional manicures can be expensive and time-consuming, and honestly, there’s something really satisfying about doing your own nails at home.
The good news is you don’t need to be a trained nail technician or have years of practice to create beautiful nail designs in your own bathroom. There are so many cute, impressive-looking designs that are actually super simple and beginner-friendly. You just need a few basic supplies and a little patience. Let’s find easy nail designs that you can absolutely master at home and that’ll have everyone asking where you got your nails done!
1. Polka Dots
Polka dots are one of the easiest nail art designs and they always look cute and intentional.
Paint your nails a base color and let dry completely. Use a dotting tool or the end of a bobby pin dipped in contrasting polish to create dots.
The dots don’t have to be perfect or evenly spaced. Random placement actually looks more organic and cute.
You can do all-over dots, dots on just accent nails, or dots in a specific pattern. It’s very forgiving.
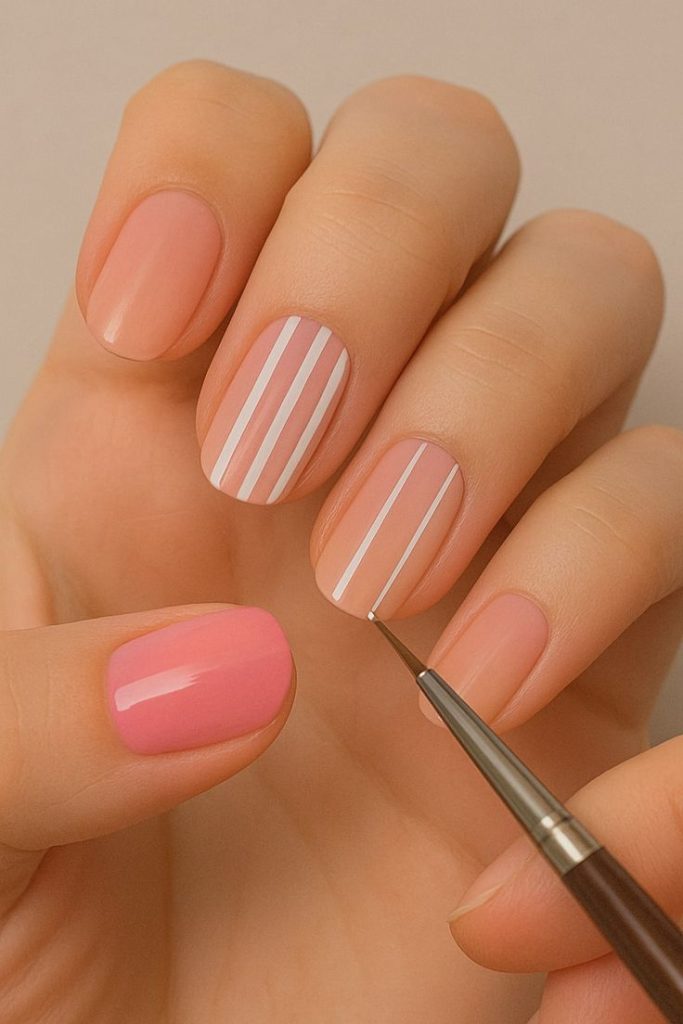
2. Single Stripe
Add one vertical stripe down the center of each nail in a contrasting color. This is simple but looks polished.
Paint your base color and let dry completely. Use a thin nail art brush or striping tape to create a straight line down the center.
If using tape, apply it to the dry base color, paint over it with your stripe color, then carefully peel the tape away.
Even if the stripe isn’t perfectly straight, it still looks intentional and cute.
3. Glitter Accent Nail
Paint all your nails one color except your ring fingers, which you paint with glitter polish. Super simple, always pretty.
Apply your base color to all nails. Once dry, apply glitter polish to just your ring fingers.
This is as easy as applying regular polish but looks like you put thought into creating a design.
The glitter accent adds sparkle and interest without requiring any artistic skill whatsoever.
4. Two-Tone Split
Paint half your nail one color and half another color. The line doesn’t have to be perfect to look good.
Apply one color to half your nail, let it dry, then carefully apply the second color to the other half.
You can split horizontally across the middle or diagonally for different effects.
Even if the line between colors is a bit wobbly, it still looks artistic and intentional.
5. Glitter Gradient
Apply glitter polish heavily at the tips and fade it toward the base for an easy gradient effect.
Paint your base color and let dry. Apply glitter polish to the tips, then use less and less as you move toward the base.
The gradient doesn’t have to be perfectly smooth. The sparkle makes any imperfections disappear.
This is much easier than regular color gradients but looks just as impressive.
6. Simple French Tips
Classic French manicure is actually quite easy to do at home with the right technique.
Apply nude or pale pink base. Once dry, paint the tips white using the brush or striping tape for guidance.
The tips don’t have to be perfectly curved. Even slightly imperfect French tips look classic and pretty.
You can also buy French manicure guides or stickers that make this even easier.
7. Color Block
Paint each nail a different solid color. No pattern or design needed, just fun colors.
Choose 3-5 colors that work well together and paint each nail a different color.
This is literally just applying solid colors but the variety makes it look like a deliberate design.
The color blocking approach is trendy and fun while requiring zero artistic ability.
8. Tape Stripes
Use striping tape to create geometric patterns. The tape does all the hard work.
Paint base color, let dry completely, apply tape in your desired pattern, paint over with second color, remove tape.
The tape creates perfectly straight lines that you couldn’t achieve freehand.
You can create stripes, triangles, or abstract geometric patterns easily with tape.
9. Half-Moon Accent
Leave a small half-moon shape at the base of your nail unpainted for a reverse French look.
Apply hole reinforcement stickers at the base of your nail, paint the rest, then remove the stickers.
This creates a clean half-moon shape at the base without requiring any precision painting.
It’s retro and chic while being incredibly easy to achieve at home.
10. Sponge Gradient
Use a makeup sponge to create an ombre gradient effect. The sponge does the blending for you.
Apply two colors side-by-side on a makeup sponge, then dab the sponge onto your nail repeatedly.
The sponge naturally blends the colors together into a gradient without requiring any manual blending skill.
This gets messy but creates a professional-looking gradient. Clean up edges with remover after.
11. Dotted French Tips
Instead of solid white tips, create the French tip line using small dots in a row.
Paint nude base, let dry, then use a dotting tool to create a row of white dots along the tip line.
This is easier than painting a smooth French tip line and looks cute and modern.
Even if the dots aren’t perfectly uniform, they still create a pretty, intentional effect.
12. Negative Space
Paint partial designs leaving some of your natural nail showing through as part of the design.
You might paint just the tips, just a stripe down the middle, or geometric shapes, leaving the rest bare.
This is easier than covering the whole nail and looks modern and artistic.
As long as your natural nails are healthy and well-maintained, negative space designs look intentionally chic.
13. Simple Floral
Create super simple flowers using dots. One center dot surrounded by 5-6 petal dots.
Paint base color, let dry. Use a dotting tool to place one dot for the flower center, then 5-6 dots around it for petals.
These simple dot-flowers look cute and springy without requiring any actual painting skill.
You can do one flower per nail or scatter multiple small flowers across each nail.
14. Newspaper Print
Create newspaper print nails using actual newspaper and rubbing alcohol. It’s easier than it sounds.
Paint nails light grey or white, let dry. Press small newspaper pieces into rubbing alcohol then onto nail. Top coat seals it.
The newspaper transfers onto your nail creating that cool print effect without any painting.
This is a fun trick that looks impressive but is actually very simple to do.
15. Sticker Designs
Use nail stickers or decals to create instant designs without any artistic ability required.
Paint base color, let dry, apply stickers according to package directions, seal with top coat.
Stickers come in endless designs from flowers to geometric patterns to characters.
This is literally as easy as sticking a sticker on your nail. Anyone can do this perfectly.
Essential Tools for At-Home Nail Art
Invest in a set of dotting tools. These inexpensive tools make dots, flowers, and other designs easy.
Get striping tape. This creates perfect straight lines that are impossible to achieve freehand.
Buy a thin nail art brush for lines and details. This gives you more control than regular polish brushes.
Keep cotton swabs and a small brush handy for cleanup. Dip in remover to fix mistakes.
Use a good quality base coat and top coat. These protect your design and make it last longer.
Preparation is Key
Always start with clean nails. Remove all old polish and wash your hands thoroughly.
File nails to your desired shape and length before starting. Shape affects how designs look.
Push back cuticles and clean up any dry skin. This creates a smooth canvas for polish.
Apply base coat and let it dry completely. This protects your nails and helps polish adhere.
Work in good lighting. You need to see what you’re doing clearly to get the best results.
Application Tips for Success
Let each layer dry completely before adding the next. Rushing causes smudges and ruins designs.
Apply thin coats rather than thick ones. Thin coats dry faster and look smoother.
Clean up mistakes before they dry. Use a cleanup brush dipped in remover to fix edges.
Seal everything with top coat. This protects your design and adds shine and durability.
Be patient. At-home nail art takes longer than simple solid color, but the results are worth it.
When Things Go Wrong
If you mess up a design, you can often incorporate it into an abstract pattern.
Small mistakes are barely noticeable once top coat is applied. Don’t stress about perfection.
If one nail is completely ruined, redo just that nail. You don’t have to start completely over.
Sometimes turning a failed design into an accent nail and doing the others solid color saves the manicure.
Remember that practice makes progress. Your tenth attempt will be better than your first.
Making Designs Last
Use quality polish. Cheap polish chips faster no matter how good your design is.
Apply top coat, let dry for at least an hour before using your hands heavily.
Reapply top coat every 2-3 days to refresh shine and protection.
Wear gloves when doing dishes, cleaning, or other activities hard on nails.
Avoid picking at your nails. This is the fastest way to ruin even the best at-home manicure.
Building Your Skills
Start with the easiest designs like dots or glitter accent nails to build confidence.
Watch tutorial videos online. Seeing techniques demonstrated helps more than reading about them.
Practice on paper or fake nails before doing designs on your actual nails.
Don’t compare your results to professional nail artists. Compare your current work to your past work.
Have fun and experiment. At-home nail art should be enjoyable, not stressful.
Time-Saving Tips
Do your nails while watching TV. This makes the time pass faster and keeps you entertained.
Use quick-dry top coat to speed up the drying process significantly.
Do simpler designs on weeknights and save more complex ones for weekends when you have more time.
Keep all your supplies organized in one place so you’re not wasting time searching for things.
Consider doing just accent nails with designs and keeping the rest solid color to save time.
Conclusion
You absolutely don’t need professional skills or salon prices to have beautiful, designed nails. These 15 easy at-home nail designs prove that with a few basic tools and simple techniques, you can create gorgeous manicures right in your own home.
Whether you start with simple polka dots, try gradient sponging, or experiment with striping tape, the key is being patient with yourself and remembering that practice improves your results. At-home nail art is fun, creative, and surprisingly achievable for beginners.
Start with the easiest designs, build your confidence and skills, and before you know it, you’ll be creating beautiful nail art that has everyone thinking you went to an expensive salon. Save your money, enjoy the creative process, and rock those gorgeous DIY nails with pride!